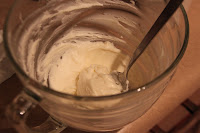
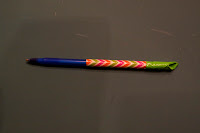
This is a video on how to make lollipops out of Jolly Ranchers! I hope you enjoy!
Macey's Making.....
Thursday, June 20, 2013
Monday, June 17, 2013
Roll and Cut Sugar Cookies
Roll and cut sugar cookies are so much fun to make. They are also very easy! Check soon for my favorite buttercream frosting and glaze for these yummy cookies!
Ingredients
3/4 cups softened butter
1 cup white sugar
2 eggs
1/2 teaspoon vanilla extract
2 1/2 cups all-purpose flour
1 teaspoon baking powder
1/2 teaspoon salt
Directions
Ingredients
3/4 cups softened butter
1 cup white sugar
2 eggs
1/2 teaspoon vanilla extract
2 1/2 cups all-purpose flour
1 teaspoon baking powder
1/2 teaspoon salt
Directions
 |
| 1. Cream the butter and sugar together in a large bowl. |
 |
| 2. Beat in the eggs and vanilla extract. |
 |
| 3. Stir in the rest of the ingredients (flour, baking powder, salt). |
 |
| 4. Cover in plastic wrap and chill for at least one hour. |
 |
| 5. Preheat the oven to 400 degrees Fahrenheit, and roll out the dough (1/4 to 1/2 inches) on a floured surface. |
 |
| 6. Cut the dough using your favorite cookie cutter(s), and place the cookies 1 inch apart on ungreased cookie sheets. |
 |
| 7. Bake the cookies for 6 to 8 minutes. |
 |
| 8. Cool completely. |
Wednesday, March 13, 2013
Chocolate Cherry Coke Float
Ever heard of a chocolate cherry coke (CCC, as my dad calls it)? If not, you are missing out. Follow the directions to create this sweet treat.
 |
| The Ingredients: -Cherry Syrup -Chocolate Syrup -Coke (Caffeine Free works best) -Vanilla Ice Cream (optional) |
 |
| 1. Pour a can of coke into a cup. |
 |
| 2. Add one tablespoon of cherry syrup to the coke. |
 |
| 3. Add one tablespoon of chocolate syrup. |
 |
| 4. Stir |
 |
| 5. Scoop two scoops of vanilla ice cream to the chocolate cherry coke. |
 |
| 6. Enjoy!!! |
Spring Baking!
I got this cute baking kit for Christmas, and recently decided to use it. If you don't want to buy it, there are alternative ideas to still get the same ice cream cone look.
 |
 |
| I used the "Ice Cream Cone Cupcake Baking Kit". This is a fun kit for all ages. I love this kit because it shows directions for kids and parents. Kid friendly choice! |
 |
| Step 1: Take out the six cones in the kit and wash them throughly. If you don't use the kit, normal cake cones will work too. |
 |
| Step 2: Either use the mix in the kit, or use your own recipe to make your favorite cake batter. |
 |
| Step 3: Fill the cones from the kit to the fill line, or if you use regular cake cones, fill them to the top of the base of the cone. Place the cones on a baking sheet. |
 |
| Step 4: Follow the baking instructions for the cake you use, as you would bake cupcakes. |
 |
| Step 5: Let the cupcakes cool COMPLETELY! |
 |
| Step 6: Make your favorite frosting to pair with the cupcake cones you made. |
 |
| Step 7: Frost your cupcake cones with a piping bag, spoon or knife, or even plastic baggy! |
 |
| Step 8: Decorate with sprinkles, chocolate chips, and other goodies to make your cupcake cones even sweeter! Enjoy! :) |
Monday, June 11, 2012
How to Make a Duct Tape Flower Pen
 |
| Materials: Scissors Ruler Pen or Pencil 1- 4 inch piece of duct tape 20-24- 2 inch pieces of duct tape 1- 4 inch piece of duct tape split into 4 pieces (optional) |
 |
| 1. Take the 2 inch long duct tape and fold it so it makes a L shape. |
 |
| 2. Fold the bottom point so the edges of the duct tape line up. |
 |
| 3. Crease the fold and make 19-23 more petals! :) |
 |
| 4. Take the 4 inch piece of duct tape and starting on the edge, roll it on to the pen. (Make sure you match it up all the way to the top) |
 |
| 5. Starting at the end of the petal, roll it on the pen like you did for the "stem". |
 |
| 6. Make sure the petal is on TIGHT! |
 |
| 7. Keep adding the petals in any order you like, until you use up all your petals. You can add more if you'd like. |
 |
| Tip: To make your flower look bigger, make the petals go higher and higher every time. |
 |
| The finished product! <3 |
 |
| Hope you try this out! You can use as many colors as you'd like, add sparkles or buttons to the middle, or add the skinny pieces of duct tape on the "stem" to make it look more "fancy". :) |
Thursday, May 10, 2012
Decorating Cupcakes!
All you need are cupcakes, frosting, and any decorations you want. The plastic containers are great to keep your cupcakes in to bring them home.
So cute for classroom parties or birthdays!
Sunday, May 6, 2012
Monkey Cupcakes
I made these monkey cupcakes for a school project, and thought I should share them with you! I iced a chocolate cupcake with chocolate icing, placed a big vanilla wafer towards the bottom, and stuck two mini vanilla wafers in for ears. Then, I found these sugar eyes and put them on, and added some chocolate frosting to look like a mouth and nostrils on the monkeys face! Comment below if you tried these out!
Subscribe to:
Comments (Atom)

